LET THE WILD RUMPUS START!
For Hudson’s 2nd party we choose a Where The Wild Things Are theme. Always a classic and beloved story, we have given the book by Maurice Sendak as gifts many times. I was not only proud to do this party for my son but to share it with thousands of readers on a very popular party site called Amy Atlas Events. Amy Altas choose my party for a featured guest dessert submission, you can see the feature HERE! It was a big honor to be featured among the best parties on the web! If you don’t follow her blog you must check it out, and by the way her first book is coming out this week!
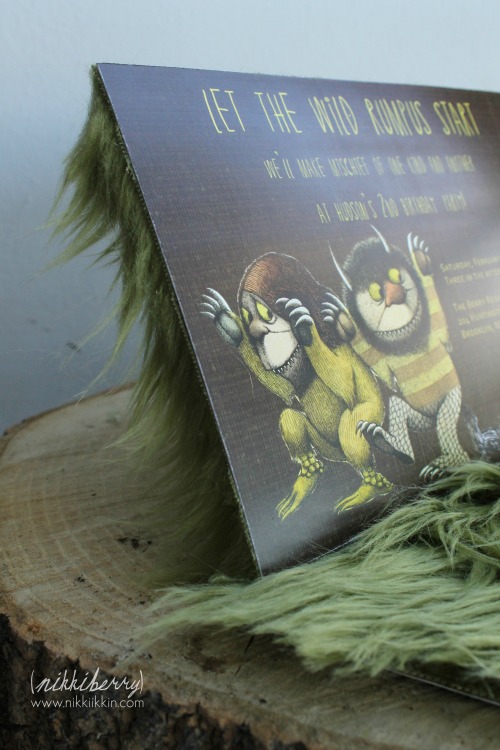
I have to give some credit to my talented sister Jes again for helping me come up with ideas for parties, we often work together on my niece Emma’s parties and I always bounce ideas from Jessica for my own as well. She mentioned adding fur to the back of the invite and it was a brilliant idea that I can’t believe I haven’t come up with before! So here is our awesome Wild Thing invite:
I can only imagine the Monster Party possibilities for this treatment on cards! To make the back of the card I cut the fur patches out the size of the card before I affixed the fur to the back of the card with spray mount. Sticky fingers and fur can be a little messy, so if you try this, use utmost care in handling, have everything laid out on kraft paper (paper bags cut open-work too) and don’t rush! To make the front of the card I scanned in images from the book to use on paper goods and for the first time ever I purchased a font to use in Photoshop. This was a big deal for me, as I am self-taught in photoshop and pretty clueless to much of what Graphic Designers learn in school. I just make it up as I go along and do what I need to do to get the job done! These cards were hand delivered but an oversized envelope would allow for extra room the fur needs, I don’t think it would need extra postage, it wasn’t heavy but again, I didn’t try to mail any.
The fur started an inspirational goal for this theme, I continued searching for ways to express the wild forest feeling of the story through texture.
Real wood is a perfect natural texture, so I hiked it over to the New York Flower District to shop for some wood cuts. My scores were a (very heavy) tree cut to use as a cake stand, a few birch branch cuts I used to stretch a paper bunting across and shorter ones to use as small display stands. The flower district is an amazing couple of blocks just south of Madison Square gardens, it used to be a very large district but like most of Old New York times are changing, and there is only a couple of blocks left. You must go early, like before 8am early, by 11am the vendors are putting their leftovers back into the coolers and shutting down for the day.
I repeated the faux fur from the invite as a runner on the desert table, which read more as grass than monster fur because it was green but it worked with the theme regardless.
What about that exotic background? I don’t think it would have mattered what anything else on the table looked like, the background made it super impressive. All different greens, shapes and sizes and it was all paper, This made it inexpensive but it was all handmade, which made it time-consuming. I used tissue paper for the top canopy foliage and the leaves, origami flowers, vines and fan flowers were made from construction paper. You can find cheap packs and multiple shades in teacher/parent supplies stores. Its better quality than a pack of typical construction paper but not as expensive as archival scrap-book paper, so I didn’t feel bad about tossing it.
Hudson’s party was a small soiree of his playmates, I have a hard time doing parties small….I can’t help but to make a big production regardless of the guest size but I did restrain myself in the amount of sweets for this party: just cake, cake pops and a take home cookie, this was plenty for 25 guests. Another table held an assortment of snacks….. and plenty of wine….gotta have the mommy juice around when the kids out number you.
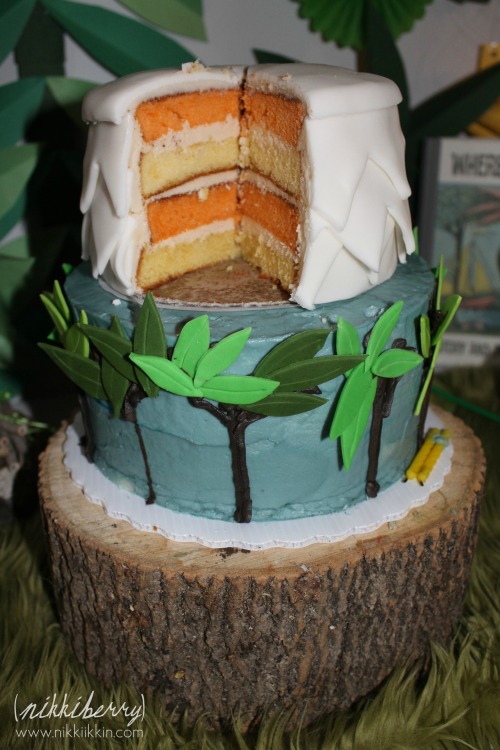
The cake was a two tier yellow butter cake, buttercream icing and fondant decorations. Each tier represented a part of the book, the bottom was the forest in buttercream & fondant, the top was fondant scales in the style Maurice Sendak illustrated on the main Wild Thing, Carol’s legs and the topper was Max’s crown simply made from fondant and dried till it was able to stand on its own. Inside the cake was multi layered in yellow and orange representing the shirt also from Carol.
Cake pops are fun but not as simple to make as people pretend them to be. This is my second time making pops and I’m still learning the techniques to make them as good as Bakerella. I did learn that candy melt needs to be thinned out with shortening to make it dip smoother. I also realized that the cake crumb has to be more finely crumbled in order for the ball to roll smooth….after I finished these. So all that being said, here are my little cake pops! I cut triangles from fondant and placed them around the top of the pop to represent Max and his “king of all wild things” crown. The pops are in a tin wrapped in natural birch bark that I picked up at the NY flower district, but you can purchase it here on www.Save-on-Crafts.com. Which is an awesome resource for building party decorations and dessert tables, by the way. I see many of these same items at the NY Flower District but I can get them for subway fare instead of shipping and handling and its also fun to haggle the vendors on pricing :)
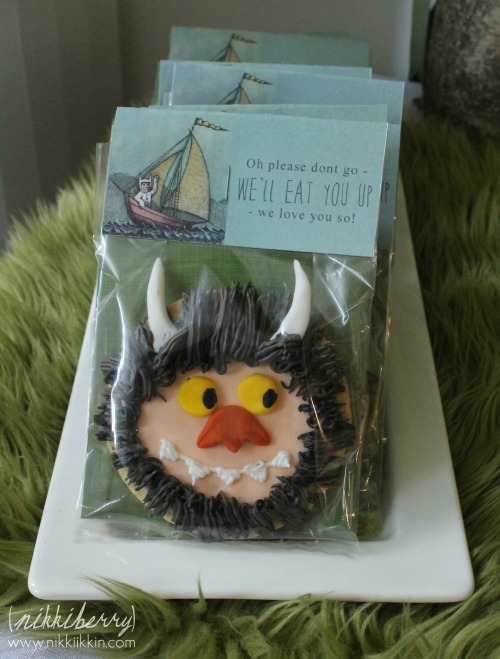
The next treat was one that I probably worked harder on then the cake, my Carol cookies were super detailed. A mix of fondant and royal icing, I layered on each facial element to give just the right 2D/3D look. My favorite part was being able to use the Wilton grass tip #233 to zip through the last element, his fur mane. After the cookie set up, I packaged them in standard 4 inch wide treat bags and topped them with a card stock topper that I designed and printed using an image from the book and the famous words “Oh please don’t go – we’ll eat you up – we love you so!” I found it very fitting to give as a departing favor. On the back it said “Thank you for joining us at Hudson’s 2nd Birthday”
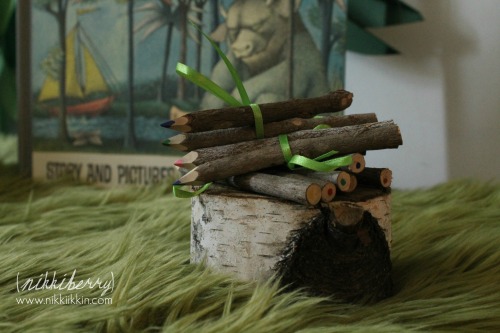
Another favor the children took home was a set of twig colored pencils. I love these pencils and have also used them as favors at Macy’s Woodland Fairie party. My husband and I laugh about the twig pencils being a “chic and new idea”, because you can pick up all sorts of wood pencils and rural decor at a Tennessee or Kentucky truck stop. So we call them,“Country Chic”, LOL, we are from Tennessee so we can make fun of it all we want :P
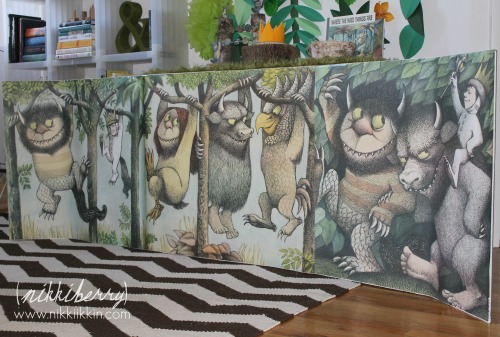
A main element for the party was an 8′ long 30″ high vinyl banner with illustrations from the book. I scanned & uploaded my pdf image and ordered the banner on sale at Vista Print. I arranged these monsters specifically for their relationship to the guests. The Wild Things were literally the size of the two year olds. I double sided taped the banner to two cardboard science project boards and used it for a background where the kids played in the living room. The kids loved it and now the banner lives wrapped around the 24″ cement column in our Brooklyn loft style apartment. Hudson wouldn’t let me put it away when he saw me rolling it up after the party.
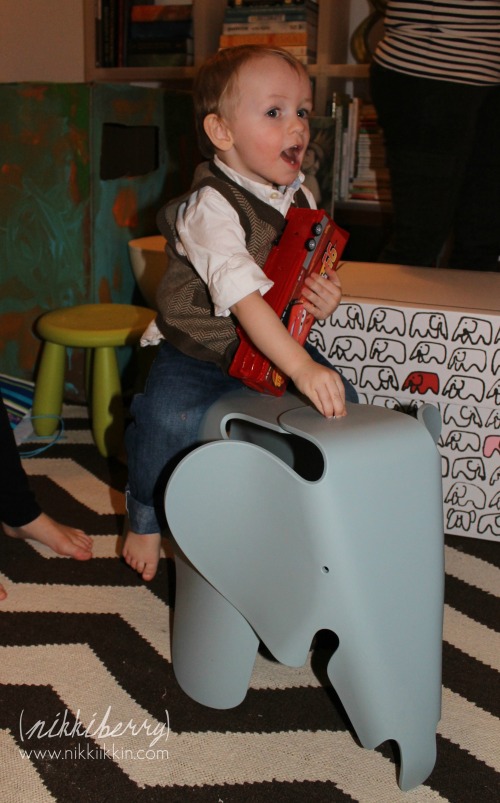
AND here’s the birthday boy, Hudson Oliver Berry, age two! He had a ball at his party with all his little friends. Luckily I caught his picture before the party because he had too much fun to hold still during the party ;)
As a very special birthday gift, Hudson received for his second birthday an Eames Elephant! If you’d like to learn more about this elephant you can read my post about it HERE.
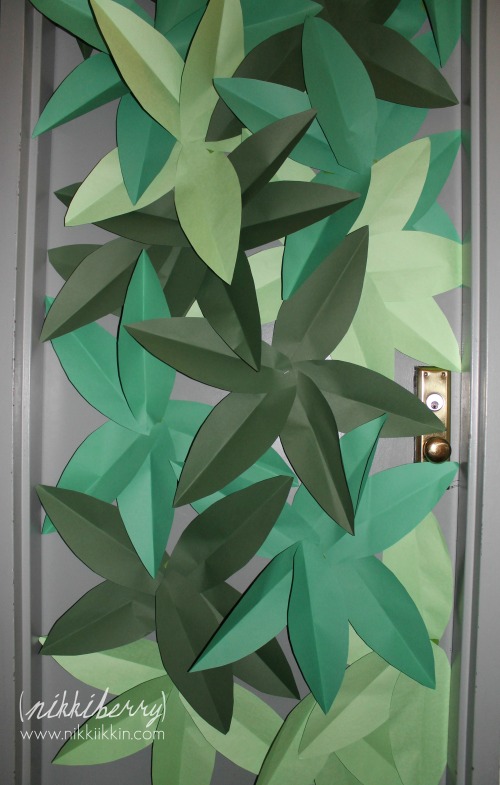
Lastly is a picture of what our guests saw first, a forest covered door that was my husband’s creation. I solely let him have creative control over this decoration. I had pictured the leaves arranged different when he explained that he wanted to put leaves on the door. I was so happy with how it turned out and glad that I let him just do it. We left it up for about a month!








I just wanted to thank you so much for posting your AMAZING party, I have been drooling over it for months. I am doing a “where the wild things are party” for my son on June 2nd and I can only pray it comes out well. I have taken a lot of inspiration from you! Thank you thank you
That’s wonderful! Im so excited to hear feedback & learn that my party is helping inspire yours! Please feel free to ask me about anything I made, I love to chat about parties! And if you want to share party pics afterwards, send them to nberryid@gmail.com Id love to see them! Have a great party!
NB
Pingback: Maurice Sendak, Beloved Author and Illustrator | NikkiikkiN
LOVELY PICS:) I really like your blog and I will happily follow.
If you want some swedish decor inspiration, you can check out my blog:)
Have a great week.
LOVE Maria at inredningsvis.se
(Sweden)
Hi Maria, Thank you for following along! I LOVE swedish design, so much beauty, innovation and design history. Look forward to exploring your site too!
Cheers! NB
Oh my gosh. This party is incredible. You did an amazing job!
Thanks Katie! Comments from other bakers always make my day, your site looks yummy too! Im excited you found me and look forward to following along your sweet site too :)
Your party was absolutely adorable!! Could you tell me more about your poster you created? THANKS!!
Hi Erica,
The poster is a vinyl banner from Vista Print. I used scanned images from the book to create a document in photoshop that I uploaded to the site. The print quality is amazing and it so durable that I still have it out, wrapped around a 30″ cement column in our loft apartment. Hope that helps!
NB
Would you be willing to send me the document you used for the poster? I tried uploading a picture last night and it cut off all of their heads. :/
Im so sorry Erica, I no longer have this file. I didn’t save it because I wasn’t printing it myself. Best of luck on your project.
NB
Thank you! I was able to configure it to work on VistaPrint. I even contacted the company and they took of the shipping charge for me! I love a good deal. :)
I love your goodie bags. Would you be willing to share the printable?
THANKS AGAIN!
Thats great! I really like Vista Print, they always have a good deal and the products I need.
I think I do have the favor bag topper. I’ve been meaning to find it and put it in my Etsy Shop. I’ll try to do that this weekend. Send me an email to nberryid at gmail.com and I’ll let you know when its available.
NB
Hi Erica,
I am also trying to have that poster printed, can you share the file?
You are so amazingly creative and the attention to detail is just fabulous, what lucky kids to have a mommy to make their world so special!
Thank you Kendra, thats so sweet of you to say. Im lucky to have them as my inspiration :)
Hi Nikki! I absolutely love this party you created. I am throwing a baby shower with the same theme. I love your cookie favors and I am curious if you have the label file you created…can I purchase this file somehow or purchase the labels? Thank you! Allison
Hi Allison, Thanks for asking! I actually do have the cookie treat bag toppers for sale as a printable in my Etsy shop.https://www.etsy.com/listing/123842651/where-the-wild-things-are-treat-bag
NB
your party is amazing!! i love the faux fur. where did you get the faux fur? I am having a hard time looking for the tree stump for the cake. how high is it?
Hello Jenny, I bought the fur from here: http://maryjos.com/store/search.aspx but it doesnt look like they have it anymore. The stump is 6″ high and very heavy! Thanks for reading and good luck with your party!
Is the stump for sale?
Sorry Jenny, I dont think its feasible to ship this stump, besides I want to keep it. I found mine at the NYC flower market, you could call your local florists and ask if they have a resource for wood cuts. Or find a lumber mill, they probably have piles of them. Createforless.com has cuts too, heres the link: http://www.save-on-crafts.com/woslcapl.html
oops, not createforlesss.com……www.
save-on-crafts.com
I am planning to use fondant to make crowns as well. How long did you let them hard-en before attachign them to the cake?
Hi Kelly, good for you for trying out some fondant! The thickness of your fondant will determine how long it takes to dry. For something sturdy enough to stand on its own you should make it at least 1/4″ – 5/8″ thick and give it 2-3 nights to dry out, depending on your weather. Rainy days or non air conditioned rooms will need the extra time.
I love all the details! So so fun! Did you create the invite and printables or did you have them customized somewhere?
Hi Amber, I did create the invite and other printables. You can find the treat bag toppers available in my etsy shop.
Pingback: Dexter’s Wild Rumpus | Daily Dex {+ Alex}
Pingback: Storybook Party Ideas - Moms & Munchkins
Hi there! Do you have the PDF you can share to upload to Vista Print that you made the banner with? If not, can you suggest how you did this? THanks!
Sorry beth I lost the file in a computer crash. I made it by scanning in pages from the book and editing it in photoshop.
NB
hello you mentioned that you got a 8′ long 30″ high vinyl banner at Vista Print. Is that the extra large size? Since the extra large size is 8′ x 2.5′
that sounds right!
yep that sounds right.
How many yards is the fur table runner?
really cant say, it was just a left over piece i had.
Would u be willing to sell me ur banner
Thanks for the interest, but I am not selling my banner.